Connecting ESP32 With Bresser Weather Station via MQTT
What do I need?
- An ESP32 with a LoRa module that works on 868MHz
- A Bresser Weather Station (for specific compatibility see the official GitHub page for the library which we will be using)
- Arduino IDE
- An MQTT broker
Step 1 - Download and set up Arduino IDE with your ESP32
- Download Arduino IDE from This Link
- Follow this tutorial to set up the ESP32.
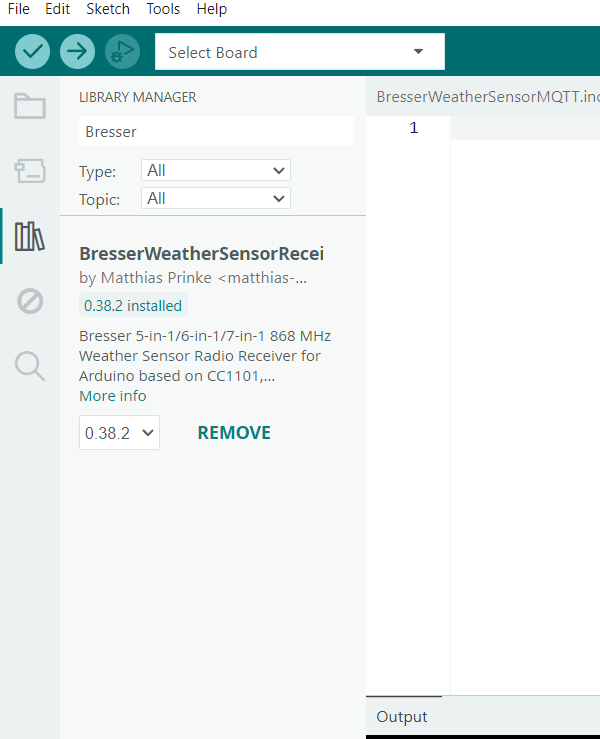
- Install the "BresserWeatherSensorReceiver" Library shown below from Arduino IDE MAKE SURE TO INSTALL WITH DEPENDENCIES
Step 2 - Open the example code
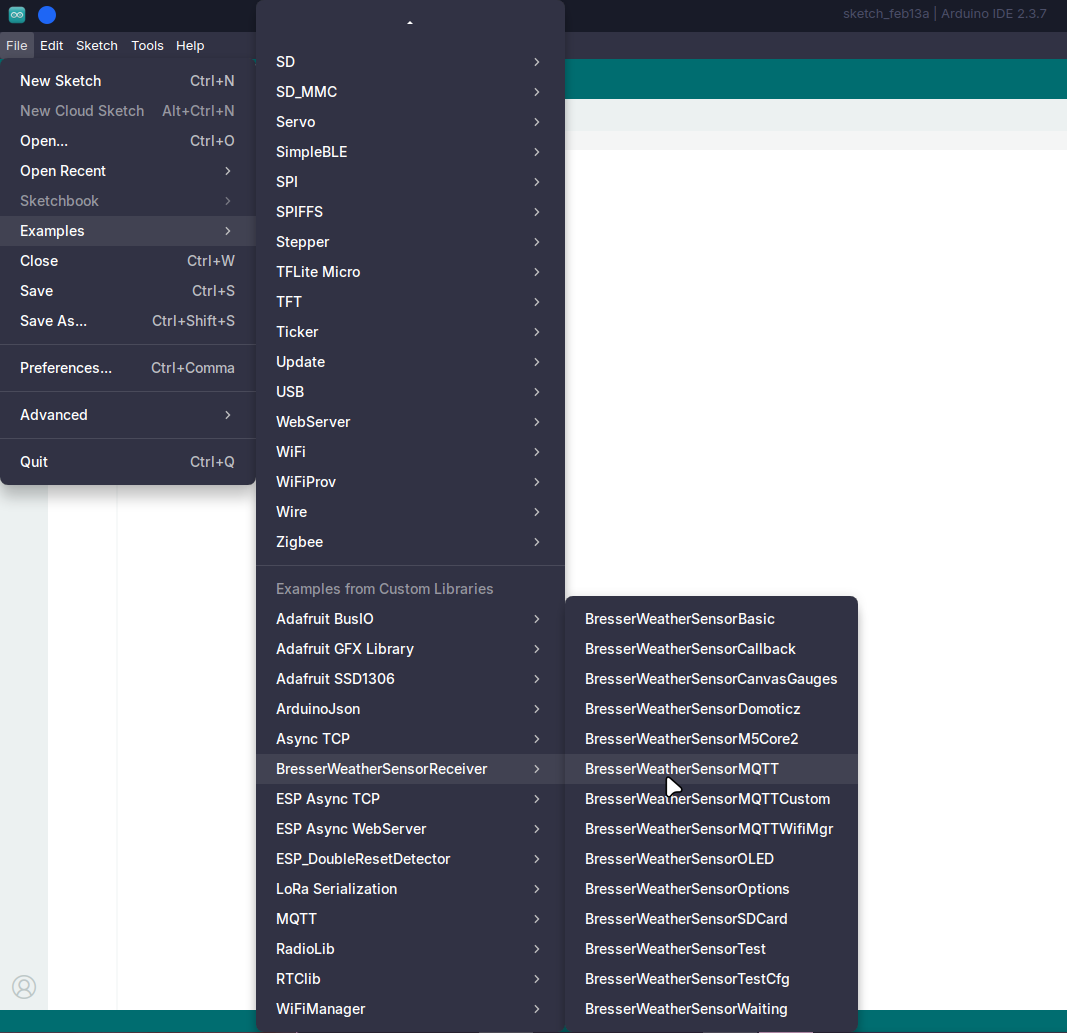
We are going to base ourselves on an example code given to us by the BresserWeatherSensorReceiver module. At the top right of your screen, navigate to File > Examples > BresserWeatherSensorReceiver (scroll down if this is not immediately visible) > BresserWeatherSensorMQTT
Step 3 - Adjusting the Example code to your will
Note: in this section I will be referring to lines in the code as they appear in version 0.38.2 of the BresserWeatherSensorReceiver library, some of these lines may move or be removed in future versions, to find the lines if the given numbers do not correspond with your example code: use CTRL + F to find the code, or downgrade your version of the library (this is at your own risk).
The first 150 lines of code are a form of documentation about what the different functions do, this can be useful but is not what we are looking for. We can skip to around line 151 to start making functional changes. Here's a list of things you might want to make adjustments to:
Line 160: Send interval
#define DATA_INTERVAL 15000 This line of code defines how often (in milliseconds) data gets sent to the MQTT server. It is important to note that while the interval for the (first) Bresser in our project is set to 15 seconds, it only sends every 25 seconds.
Line 164: WiFi Retries
#define WIFI_RETRIES 10 This line sets how many times your ESP is going to attempt to connect to WiFi before it gives up and takes a break, personally I have seen lots of issues regarding connecting to WiFi quickly, so i recommend bumping this up a little bit to reduce any chance at connection failures. Personally we have this set to 100 but 20 may be fine for your use case.
line 166: Sleep_EN
#define SLEEP_EN true If this is set to true the ESP will go into deep sleep every time it sends data through MQTT, I STRONGLY recommend turning this off especially if the WiFi connection is unstable, as every time it goes into deep sleep, it will lose connection to WiFi, causing it to have to attempt to reconnect, which in my experience is very unreliable. To disable it, you can comment the line using '//'.
Line 168 & 169: Secure/insecure Wifi
//#define USE_SECUREWIFI
#define USE_WIFI
If line 168 is commented and line 169 isn't, it will connect using insecure WiFi, and the same works in reverse. If line 169 is commented and 168 isn't, it will connect using secure WiFi. You can choose freely between the two, However if you want to use secure WiFi you will require a certificate. This tutorial does not cover how to do this. If you keep both defined or undefined you will receive an error.
REQUIRED Line 239 & 240: SSID & Password
const char ssid[] = "WiFiSSID";
const char pass[] = "WiFiPassword";
If you want this to work you will have to adjust the ssid and pass variables to that of the WiFi network you want to connect to.
Line 243: Hostname
const char HOSTNAME[] = "Bresser"; This line defines the hostname of your ESP for when it connects to the WiFi, this can be changed as you like.
Line 245 - 248: MQTT credentials
#define MQTT_PORT 8883 // checked by pre-processor!
const char MQTT_HOST[] = "xxx.yyy.zzz.com";
const char MQTT_USER[] = ""; // leave blank if no credentials used
const char MQTT_PASS[] = ""; // leave blank if no credentials used
You can set the MQTT port on the first line, use 8883 for a secured connection, and 1883 for a non-secured one. The MQTT_HOST needs to be set to whatever the host address of your MQTT is. MQTT_USER and MQTT_PASS are only necessary if the MQTT server is set up to require authentication to access it.
Extra info regarding the handling of MQTT topics
Between lines 542 and 552 we can get very useful information about how topic names are created.
Hostname = Hostname + ChipID;
// Prepend Hostname to MQTT topics
mqttPubStatus = Hostname + "/" + mqttPubStatus;
mqttPubRadio = Hostname + "/" + mqttPubRadio;
mqttPubInc = Hostname + "/" + mqttPubInc;
mqttPubExc = Hostname + "/" + mqttPubExc;
mqttSubReset = Hostname + "/" + mqttSubReset;
mqttSubGetInc = Hostname + "/" + mqttSubGetInc;
mqttSubGetExc = Hostname + "/" + mqttSubGetExc;
mqttSubSetInc = Hostname + "/" + mqttSubSetInc;
mqttSubSetExc = Hostname + "/" + mqttSubSetExc;
By default most topic names will use the hostname that was set for the WiFi along with the ChipID (an ID unique to your ESP32). to create the root topic, and append hard-coded variables to them as the subtopics. There is no harm in changing these whatsoever and you may do so as you please.
An exception to this is the "Data" topic which sends all the data which was read off of the sensors. This is handled in mqtt_comm.cpp which can be found in the src folder next to the .ino file. To find the topic names search for keywords like "temp_c" or "humidity", for example, in our project, we changed jsonSensor["temp_c"] = weatherSensor.sensor[i].soil.temp_c; to jsonSensor["Temperature"] = weatherSensor.sensor[i].w.temp_c; and jsonSensor["humidity"] = weatherSensor.sensor[i].w.humidity; to jsonSensor["Humidity"] = weatherSensor.sensor[i].w.humidity;.