How to setup any ESP32 board with Arduino IDE
Step 1: installing the IDE
- Go to https://www.arduino.cc/en/software/ and choose your preferred install method
- Run the installer and click through, accepting all the default values, unless you have a reason not to. Once it is finished you can now hopefully run the IDE without issue.
Step 2: Setup Additional Board manager URLs
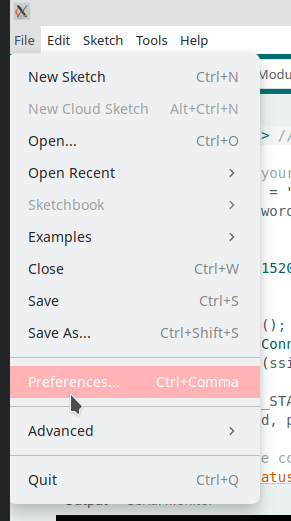
- Navigate to File > Preferences
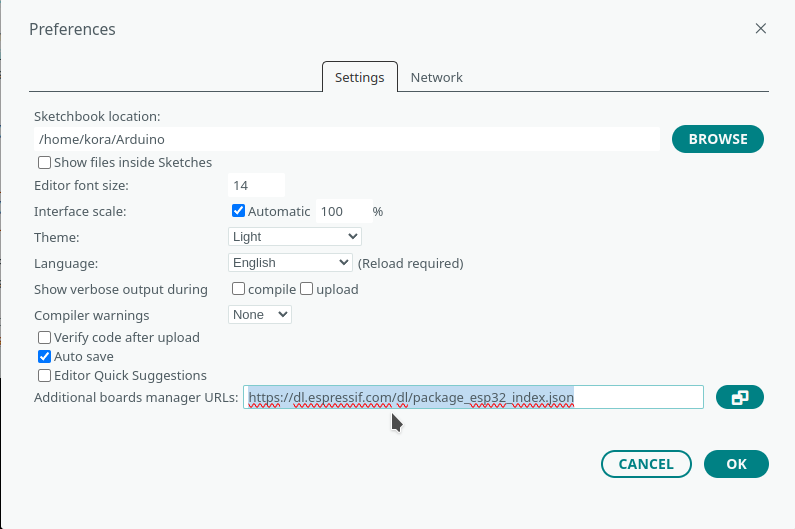
- Paste this link under "additional board managers"
Step 3: Download Board Manager
- Click on the Board Manager Icon as shown below
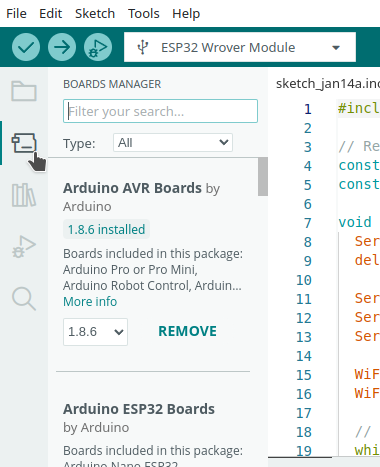
- Search for "esp32" and make sure you select "ESP32 BY ESPRESSIF SYSTEMS" NOT BY ARDUINO!!
- Press the install button and wait for it to install
IF YOU ARE HAVING ISSUES REGARDING A TIMEOUT WHEN INSTALLING:
- Open:
C:\Users\<ENTER USERNAME HERE>\.arduinoIDE\arduino-cli.yamlwith any text editor - Add the following to the end of the file:
network:
  connection_timeout: 300s
Step 4: Select the correct Port and Board
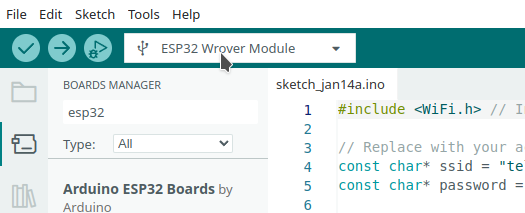
We've now installed all the boards, but we still need to select them, so click on the board as shown in the screenshot and select the board which you are using, the Freenove Basic ESP32 Starter Kits use an ESP32 Wrover Module, so that's what I'll be selecting, but you should look this up for your individual board type. It can usually be found on the product page of your ESP32
Step 5 - Well Done:D
You can now compile to your heart's content:)